
Building an undrilled, unpainted, un-whatever Strat or Tele kit
.Just added a page on how to make a Tele body from a slab of wood (bodyblank). May be of interest if you go to this point already!!
Workshop participants frequently ask if they can bring a complete kit or if i can provide one, so they can go home with a ready made guitar of their own.
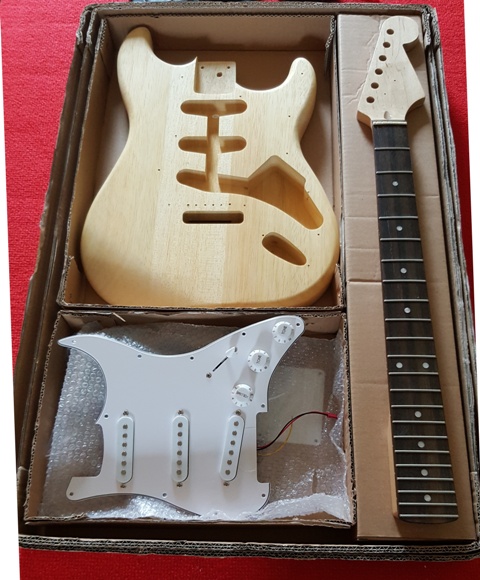
So I decided to try out a kit - the cheapest i could find, before risking my workshops. I think it was 50 USD or thereabouts. This is a worst case scenario. Recently i found kits now that are much better quality and much more pre-engineered. I'm selling to users in Holland, otherwise shipping cost can become very substantial. Above is the kit as i use now in the workshops, the rest of the story is based on a worst case kit.
I bought one of these cheapo complete kits. Nothing had been drilled, worse, the nut still had to be routed into he neck. For a 4 hour workshop not a realistic goal, leaving aside quality of the components. Another issue is that the kit came without any documentation. Compared to building a guitar with used but drilled components you easily need 3 to 4 hours extra. This improves of course with the amount of off-factory predrilling as with the more expensive kits. Moreover, the proud owner has to take his instrument apart again in order to spray or otherwise finish it - most kits come unfinished. I dont spray the guitars during workshops.
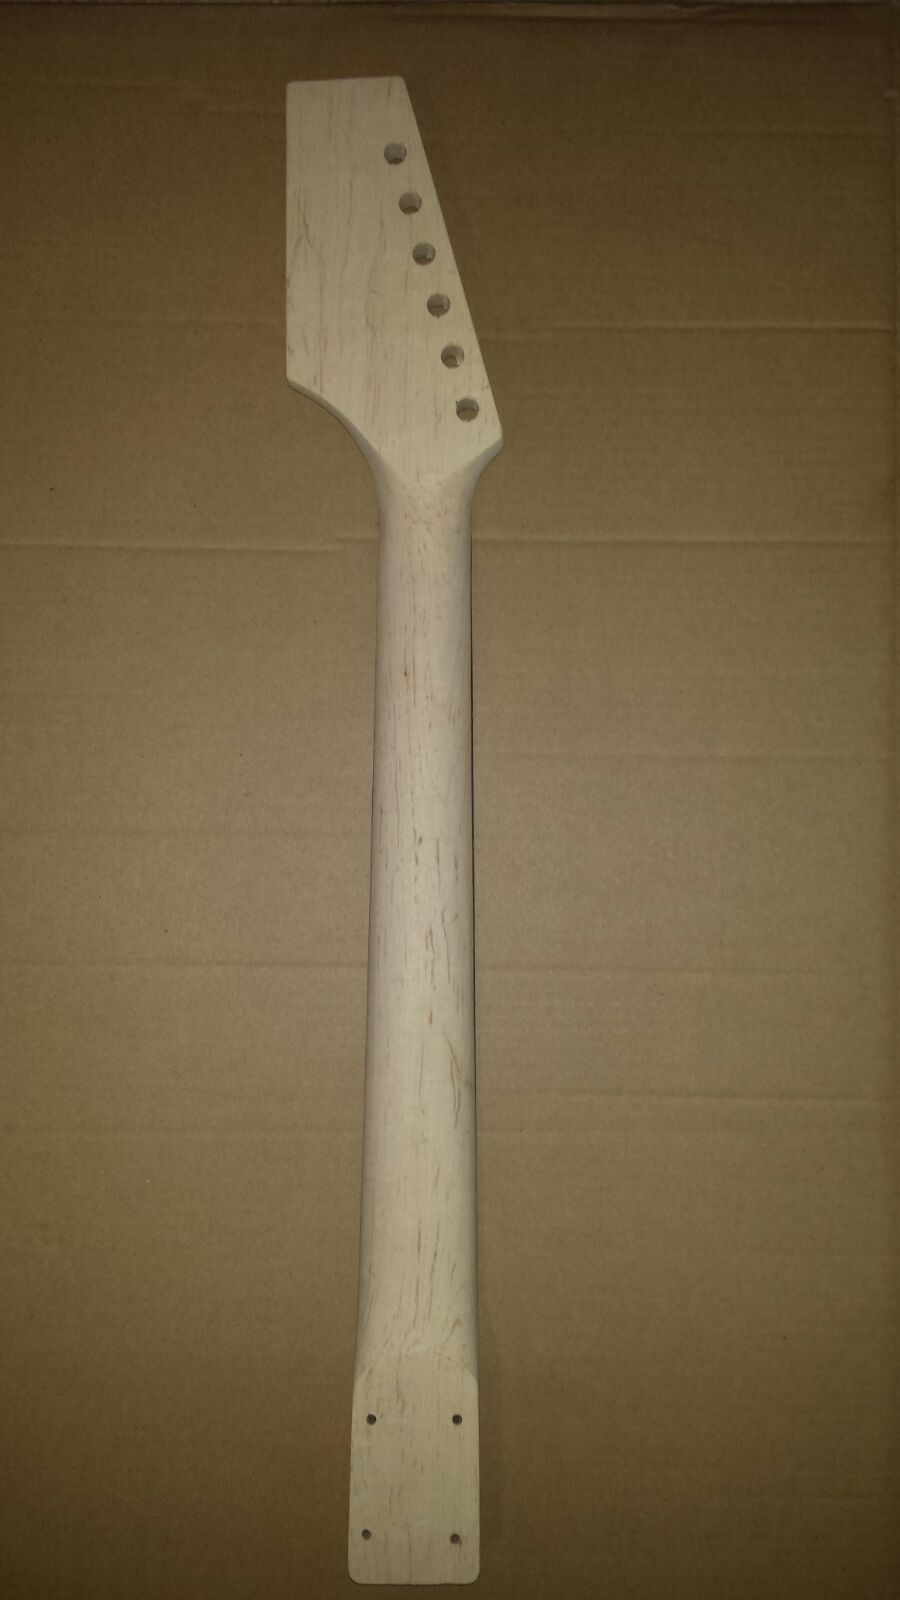
Many of these kits come with the headstock as in the pic below; called a paddle. The idea is that you can shape the headstock to your own design. The kits i resell will have the basic Strat or Tele shape.
I'll show here how to go about placing the bridge correctly, preparing the neck/body joint and aligning and fitting the neck.
And all that witthout any specialised equipment or templates, except a drillstand but they are easy to find. If you have to get 400 euros of special tools for a one time project, you might as well go to the guitaf shop and buy a brand new MIM Strat!!
The only problem where you may need specialised tool is if the nut hasnt been routed. You better get some help there from a wood worker with a top router to avoid a bloody mess.
Determining the bridge position (if not present)
We need the bridge in place first in order to line up the neck. Lining up we do with the two outer strings (see later).
There are two important dimensions here, the vertical and the horizontal position - as follows:
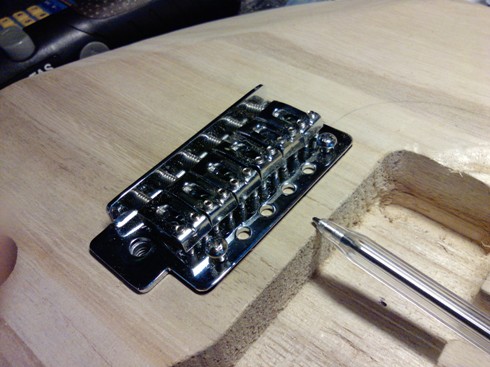
Place the brige with the inertia block in the route for the block. - that hole in almost all kits in place.
Find the middle line of the body and place te bridge such that the space between the two middle saddles lines up with that line. If you place the body upside down, look in the spring cavity. There you can also easily draw a center line,in this case it must line up with the small hole in the inertia block for the middle spring.
Another useful measurement is that the body at the widest point is 322 mm (standard). So if your middle line sits roughly at 160 or 161 mm, you are not far off.
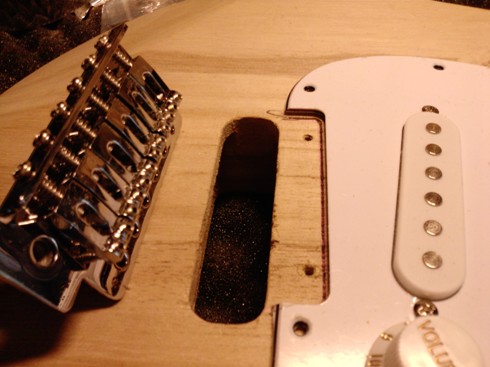
The scale of a Strat is 648mm, so the other dimension of your bridge should allow for a nut - saddle distance of around that. You need enough headroom there to adjust intonation. Check against your pickguard. Based on all this mark the position of the two outer screws, and fix it in place. So far so good. Now the body - neck joint.
If the bridge is misaligned for whatever reason, dont despair. Fill the unused holes with satay sticks or similar and a bit of glue; then restart.
The body / neck joint (if not done)
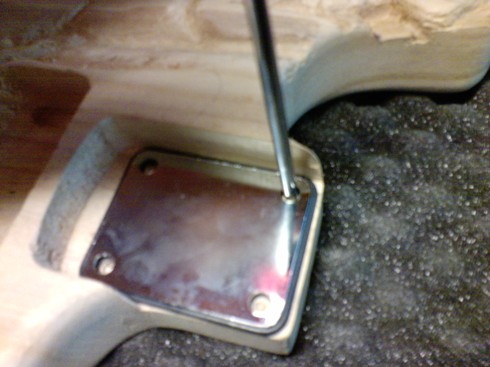
Get a neckplate and fit it into the neck pocket.
The line between the two innerscrews should be about 16mm from the cavity wall. The neckplate must be perpendicular to the body axis. and a few mm from the open side. Mark the holes and drill exactly vertically (definitely use a stand!!) thru with a 4.5mm bit.
First mount the two outer tuners on the neck, you need two strings to line up the neck in the following step.
Now turn around the body and mount the neckplate with four screws, the tips just remaining under the surface - thats important.
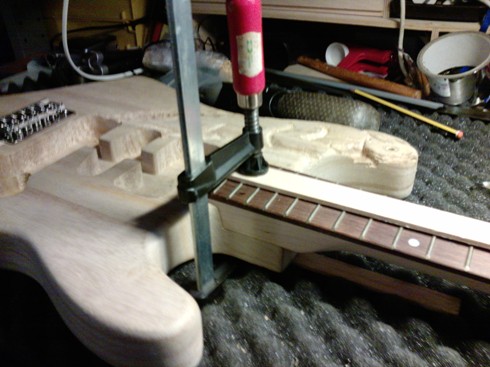
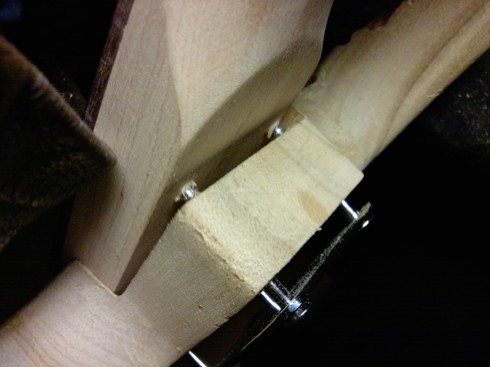
Get a clamp and two pieces of wood. Fix the neck in place and hold it firmly in place with the clamp, use two small pieces of wood protect body and fretboard. Now mount the two E-strings and give a bit of tension.
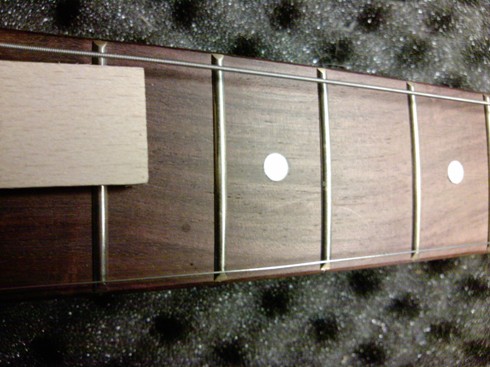
Check if the two strings line up nicely with the sides of the neck. Wriggle the neck in place until they line up nicely.
Now , with the neck in the correct position, turn in the four screws such that they just 'bite' into the neck. Take them out and get the neck off again. Now that there are four nice markers where the holes for the screws should be drilled.
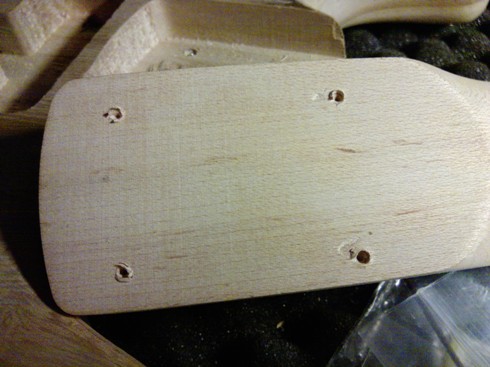
Next drill the neck using a 3.5mm drill - not deeper than 15mm - protect de drill with tape (to prevent drilling to deep, or worse right through).
In some kits you may have to drill the connecting channels between pickup cavity and jackcavity, as well as between pu cavity and the spring cavity at the back , which is where the ground lead to the springclaw should go. You need a long (15 cm) 4.5 or 5 mm drillbit.
Now take the body and neck in a vertical position (my preference) so you can clearly see if the screw tips neatly fit into the drilled holes.
Then tighten the screws, diagonally and work round the clock. Take care they are fastened with about the same force but dont overdo it.
Done.
The rest is identical to building a Strat with used and therefore complete parts.